Creating a Business Listing
Introduction
Learn how to create a new business listing using our platform's front-end options. This guide will help you through the process step-by-step.
Using the Business Plans Menu Item
- Register or log in to your account.
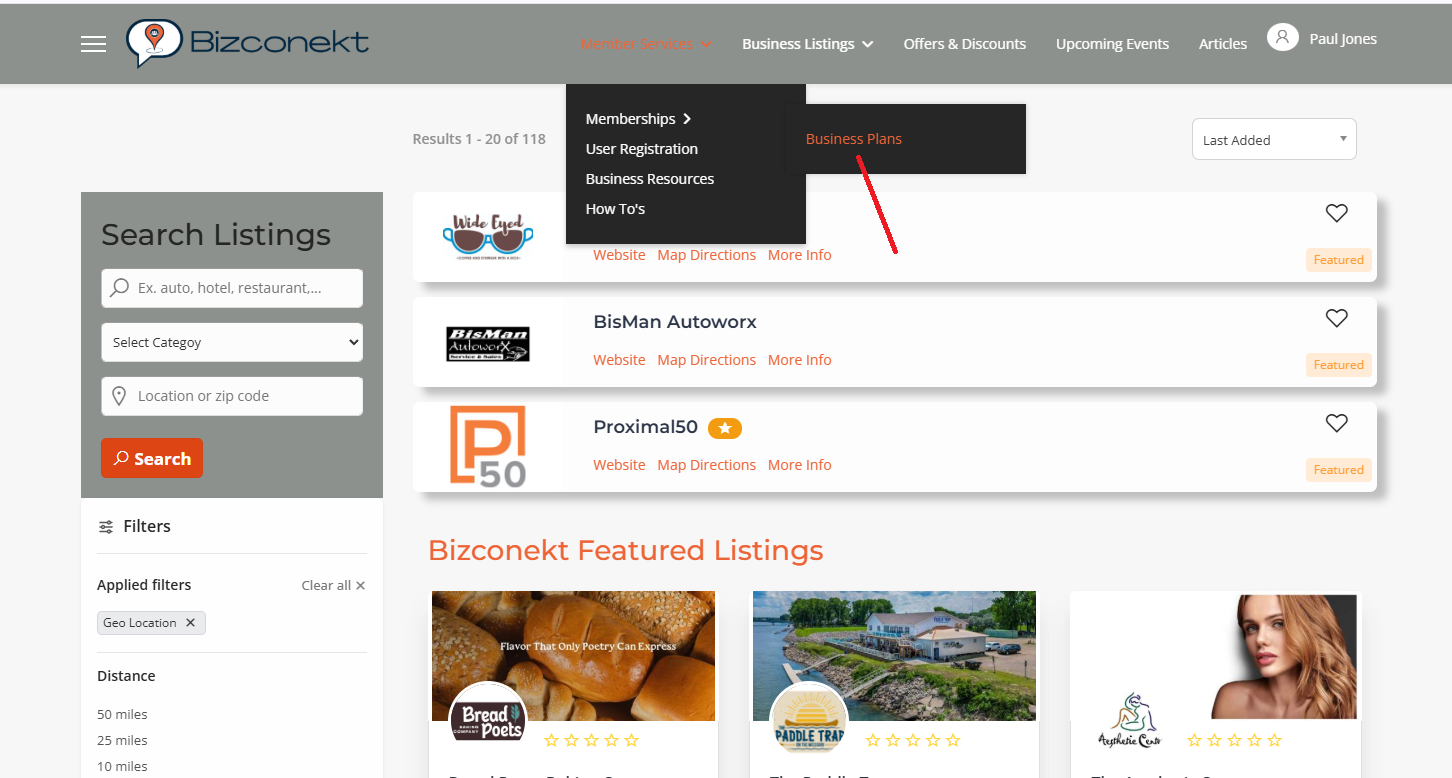
- Select "Business Plans" from the top menu
- Select the desired package from the Business Plans menu.
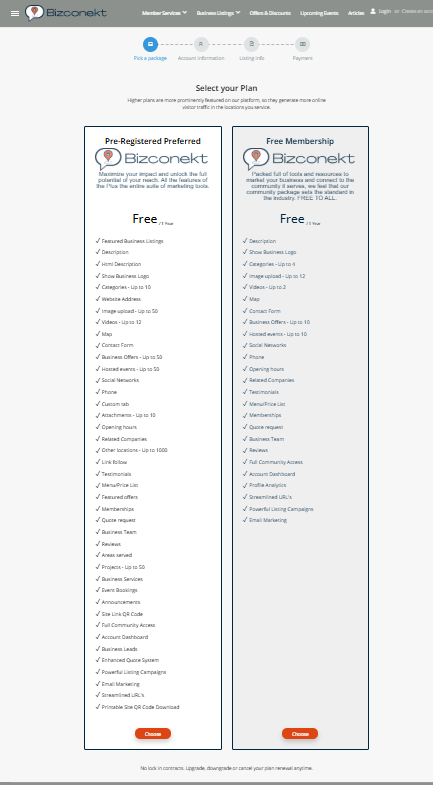
When the user chooses the desired package, s/he will be required to register or login. After this process, the user will be redirected to the listings’ edit view, in which s/he will have to fill in all the details.
- Complete all required business listing details.
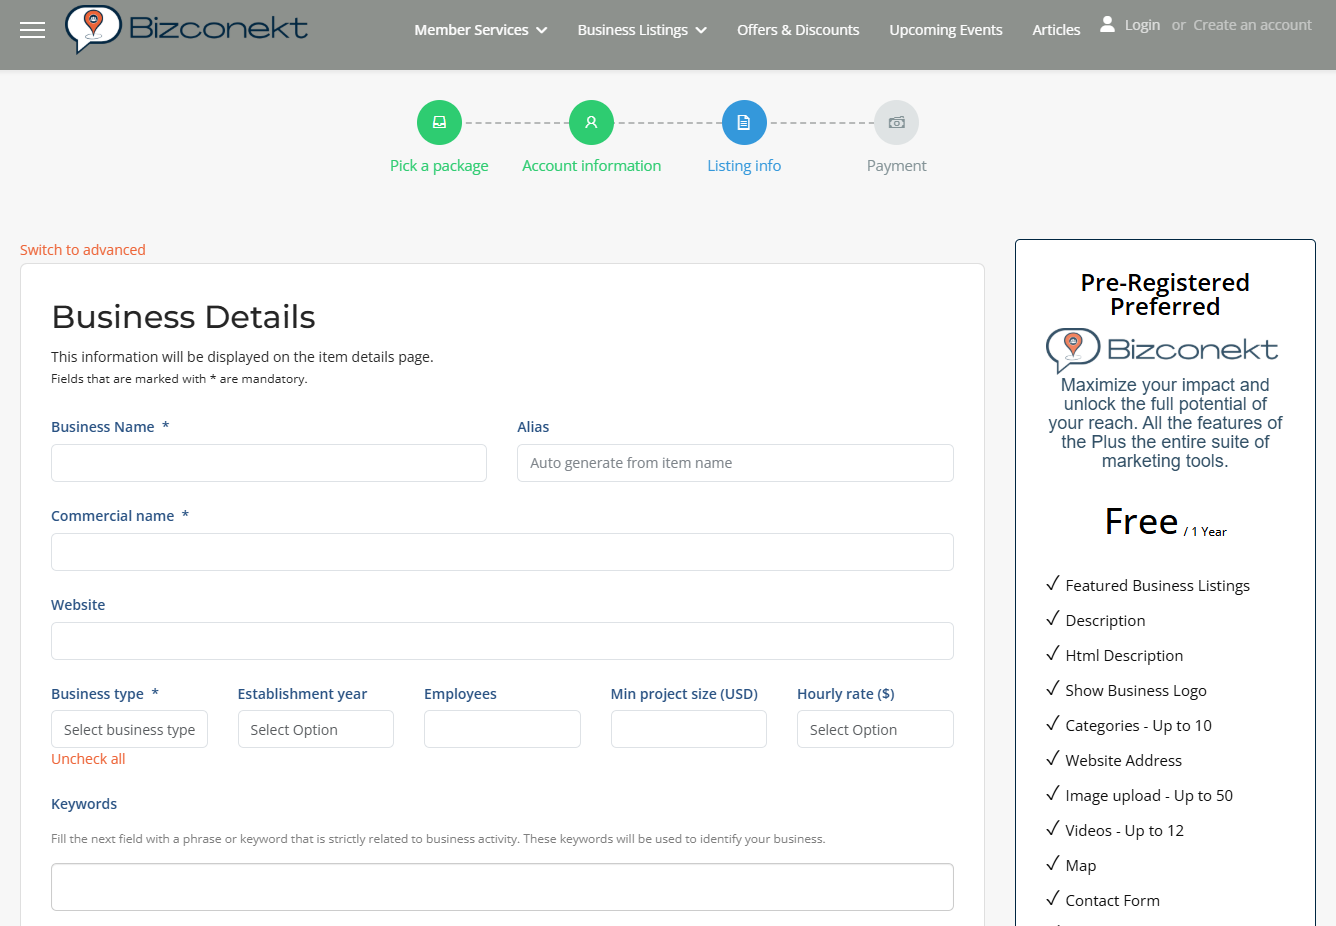
When all the details have been completed, the listing can be saved and the user will be redirected to fill in the billing details. On the right side of the screen, it will display the required total summary that needs to be paid.
When the payment is complete, the listing will be created with an active – paid business plan (package). The newly created listing needs to be approved by the site administrator in order to be displayed in the search results.
Note: If there are no free packages defined, the listing will not be shown on the front-end until the order is paid.
Using the Dashboard Control Panel
- Log in or create a new account to add a new business listing.
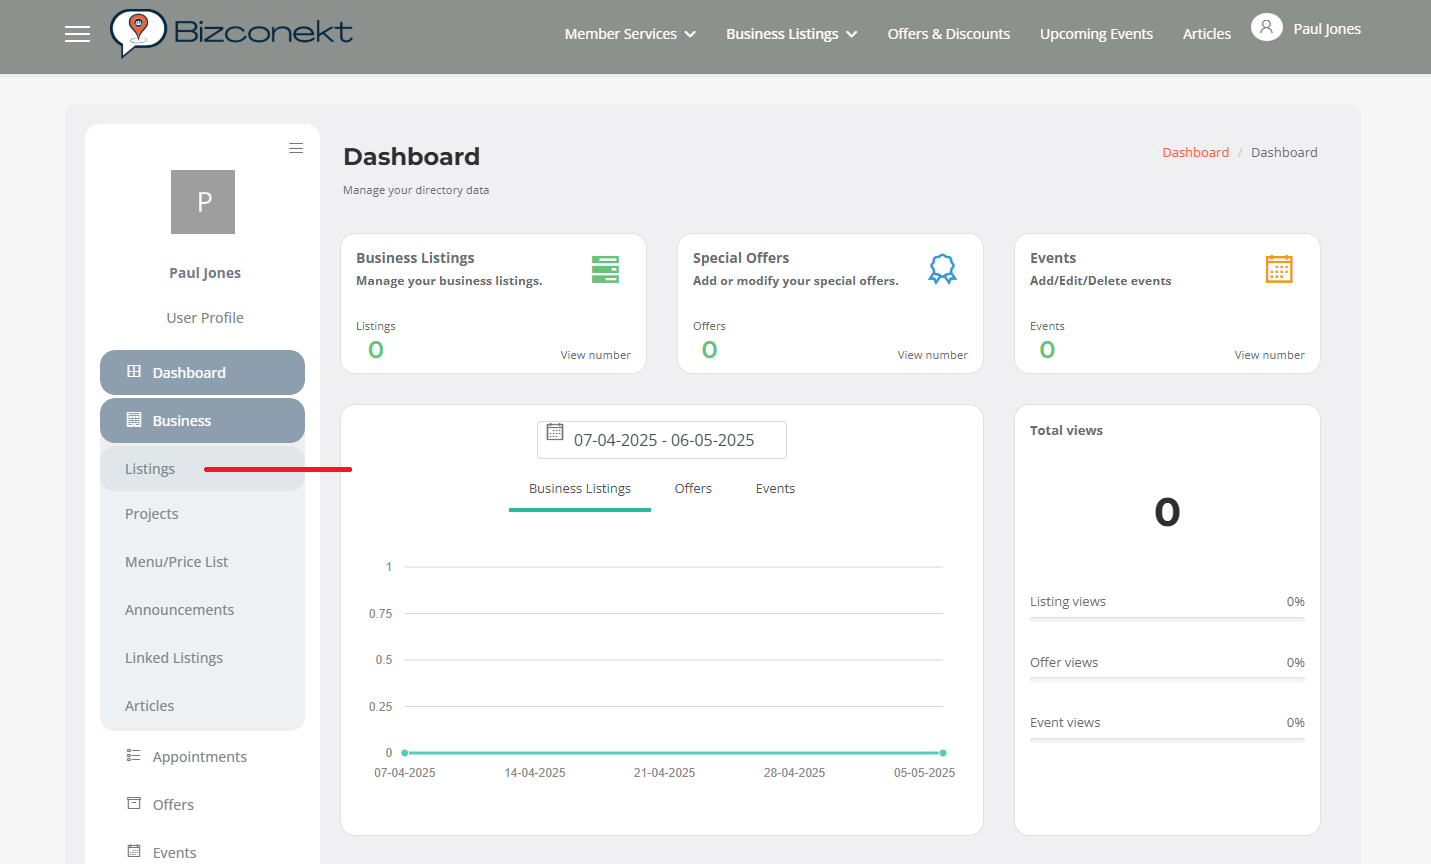
- Select the "Dashboard" option by hovering over login user name.
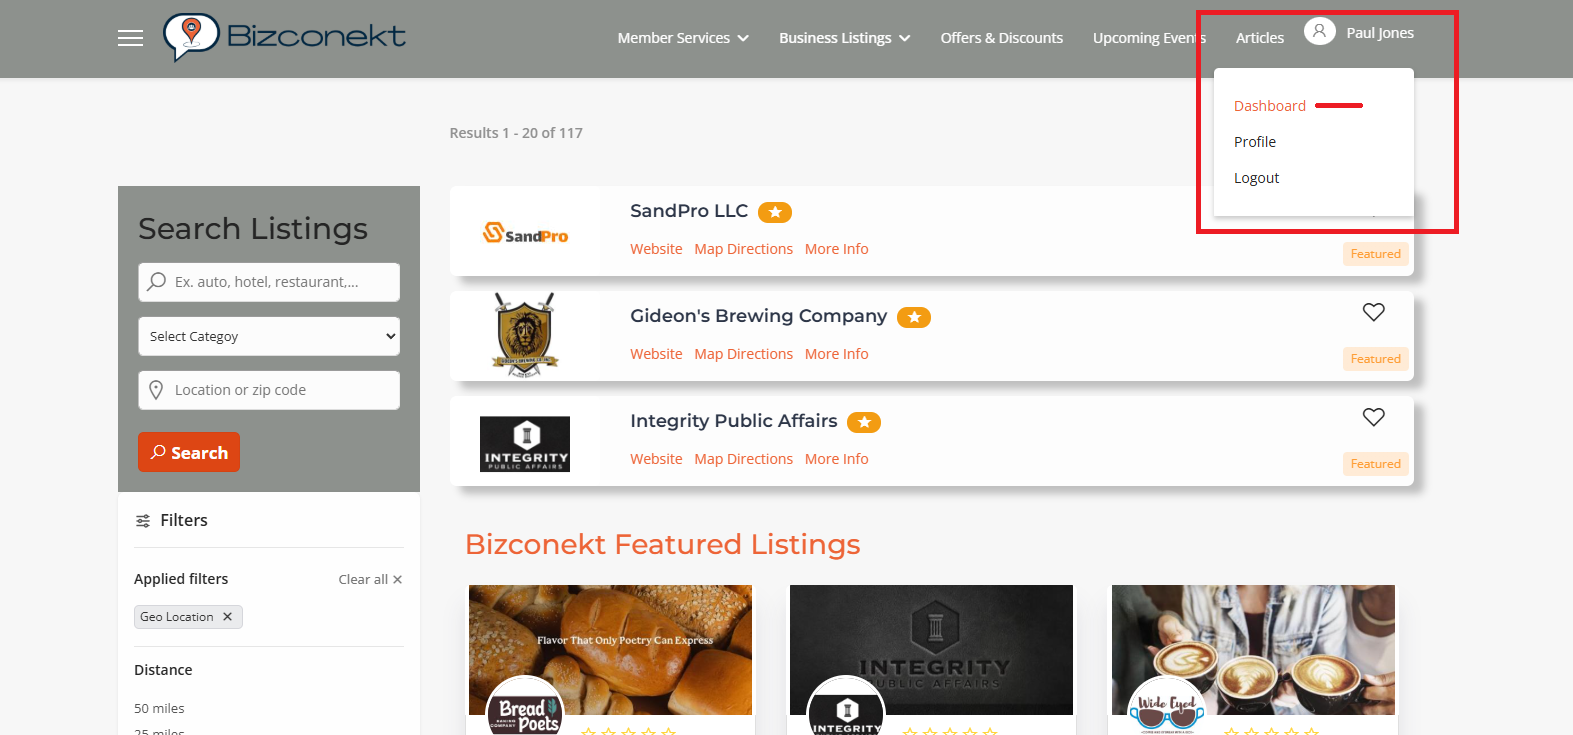
- On the right side dropdown menu select "Business" and select "Listings" from the dropdown.
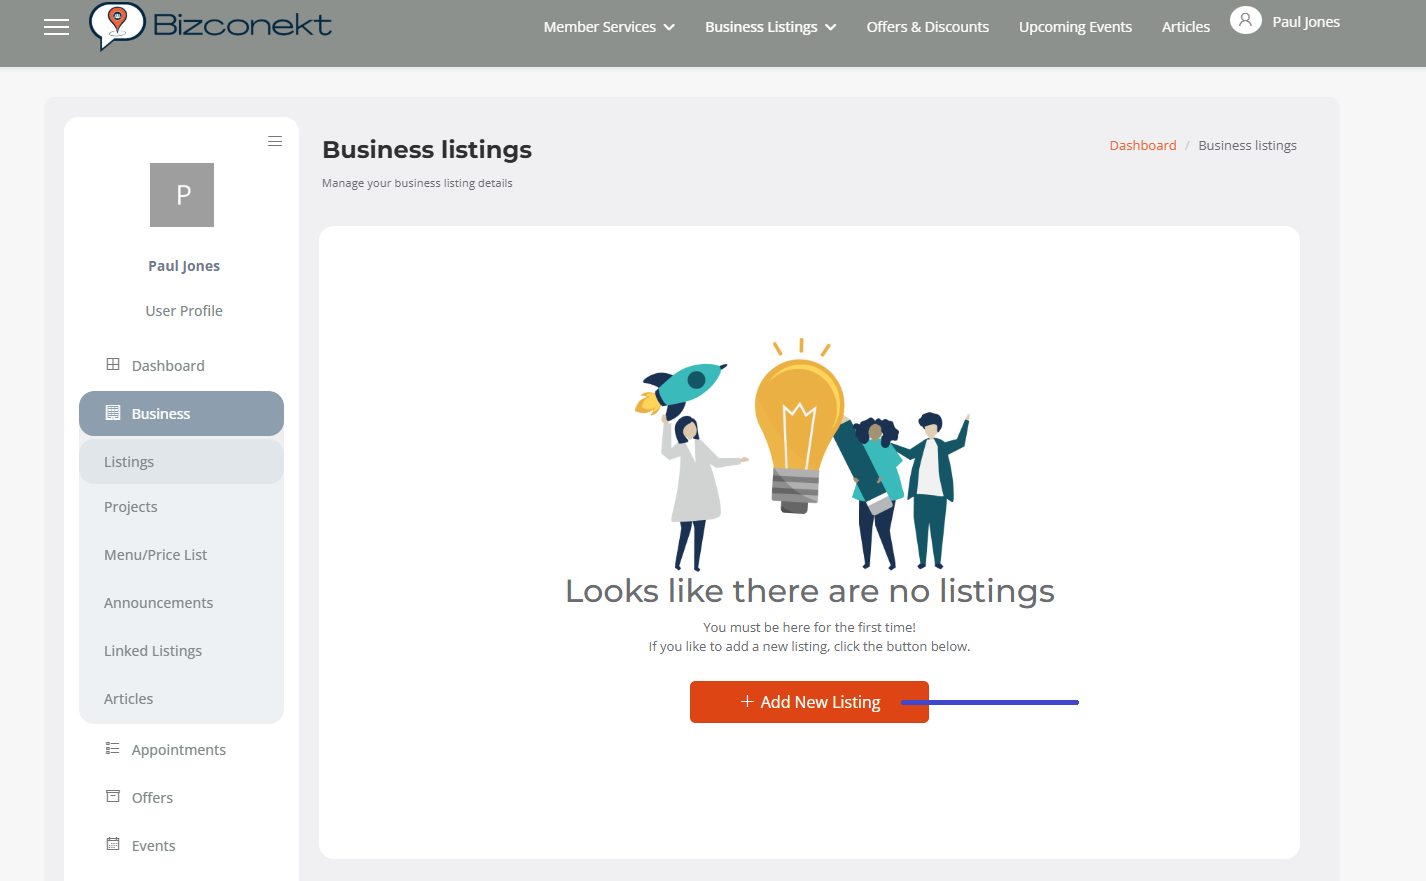
- Select "+ Add New Listing"
Using the "Add a Business" Menu Item
Log in or register to create a business listing. Once registered, you will be redirected to the "Add a Business Listing" page, where you can fill in the mandatory listing details.
Approval Process
Once created, the listing enters a “Need Approval” state and must be approved by the site administrator.


